 Preserving your film, photo & video memories on DVD
Services Menu
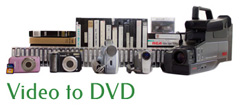


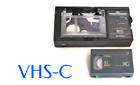


First - determine/ensure that the tapes were created here in North America as we use a different frame rate than the rest of the world. We use 30 frames per second while the rest of the world uses 25 frames per second - ergo, I can't capture PAL/SECAM videos as our VCR's play back at 30 frames per second. So, once you've determined the origins of your tapes, box 'em up... bag 'em up... wrap 'em in elastic bands... I don't care how you do it, just get them to me. Once you get them to me, your job is done!
If your analogue tapes are numbered or labeled with the date ranges, that's perfect. However, if you only numbered the box or case but not the tape (which has happened more often than not I'm afraid) then it's quite possible that the tape in the case is not the right tape! If you didn't number or label the tape but used the 'Date Stamp' feature built into your camera, that's perfect too! Unfortunately, and this has happened hundreds of times with clients, as they get deeper into the life of the camera and have used it for about 3 or 4 years, for some reason they stop using the date stamp OR they never set the date & time up properly when they bought the camera. This is especially true for the digital cameras - if the date & time were not set up properly, then the digital time and date written into the tape code will be wrong. I can usually sort that out by watching a scene of a known date (like a birthday party, or Christmas).
There's no quick way to do it. If you give me 40 hours of video tape, it's going to take me 40 hours to capture it! Tape is captured in 'real time' and there's no way to speed that up. I always capture in .avi format (uncompressed video) which makes it easier to edit and detect scenes later on and I usually only capture about 10-15 minutes at a time. Then I stop and restart the process for another chunk of video. I need to stay and monitor the capture process to avoid 'out-of-synch' issues caused by frames dropping for one reason or another. If the date stamp was never used and it's an analogue tape, I need to watch the video to identify sections that have birthdays and other recognized holiday events that'll help me identify when the footage was taped.
Once I run all the captured video through the 'scene detection' process, all the footage is placed on the timeline of my software package. This 'Timeline' can be up to 40 hours in length (if you gave me 40 hours of video). Once all the footage is in the right order (if that's possible), I break it all up into 60 minute segments for each of your discs.
Sure, I can put up to 3 or 4 hours of video on one single layer DVD - and a lot of company's will do just that! After about 64 minutes on each disc, the video quality starts to degrade and if I'm working with 20 year old VHS tapes, the quality is already likely pretty bad - so no point in making it any worse - 60 minutes is my limit! Besides, who wants to sit through more than an hour of home video anyway? Nobody I know - that's for sure!
Each 1 hour segment of video is introduced by using your family name, the disc number and the date ranges included on that disc. If I can't figure out when that video segment was taped and you can't give me a date either, then instead of a date range, I'll use descriptive lines like, "Our Trip To The Rockies", followed by, "Summer at the Cottage", etc. Then I create a custom menu and for the background I use a segment of video that is contained in that footage with each chapter point identified.
Once I tested everything and it's running properly, I 'render' the entire project as one DVD. The resulting process takes about 20-30 minutes if it's Standard Definition video or about 3-4 hours if it's High Definition.
Once the rendering process is complete, I use Nero to burn the project onto a Taiyo-Yuden Watershield DVD-R. This process takes a further 10-15 minutes as I always select one of the slowest burn speeds for the disc I do this to prevent any issues with the burn process that can leave little irregularities on the final DVD. I also burn an extra copy so 'just in case' you need an extra or replacement disc, I can have it ready for you on the same day!
![]() Copyright 2015. Soft Touch Video
Conversion - 2004. All Rights Reserved.
Copyright 2015. Soft Touch Video
Conversion - 2004. All Rights Reserved.